Drilling an aquarium lets you add sealed plumbing for sumps, overflows, returns, or filtration lines.
I’ve drilled many tanks as a hobbyist and installer, so I know the questions and risks. This article explains why drill an aquarium, when to do it, the right tools, step-by-step technique, sealing and troubleshooting tips, and real-world lessons I learned. Read on to get confident, safe, and practical guidance for drilling your aquarium the right way.
Why drill an aquarium: primary reasons
Drilling an aquarium is usually done to create reliable, hidden plumbing. People drill glass or acrylic to install bulkheads for returns, drains, overflows, and emergency drains. Drilling gives a clean port for plumbing that keeps the tank rim free of messy hoses and connectors. Knowing why drill an aquarium helps you choose the right approach for filtration, sump setup, or aesthetic needs.
- Common uses when people ask why drill an aquarium
- Install a bulkhead for a sump return or drain
- Create an overflow or emergency drain
- Fit external heaters, probes, or dosing lines through a port

When you should and should not drill an aquarium
Drill an aquarium when building a sump system, planning an in-tank overflow, or routing clean plumbing through the tank wall. Don’t drill if the tank is too thin, made of fragile glass, or if you lack the right tools and experience. New hobbyists should avoid drilling expensive tanks until they practice on scrap glass or cheaper tanks. If you have doubts, consult a professional or an experienced hobbyist before attempting the cut.

Glass versus acrylic: material considerations
Glass and acrylic behave very differently when you drill them. Tempered glass cannot be drilled safely; it will shatter due to internal stresses. Annealed or laminated glass can be drilled with the right bits and careful technique. Acrylic drills faster and cleaner but needs slower feed and lower heat to prevent cracking or melting. Identify the tank material and check whether the glass is tempered before you touch a drill.

Tools and materials you’ll need
Using the right tools makes the difference between a clean hole and a cracked tank. Gather these items before you start.
- Diamond hole saws sized to match your bulkhead
- Drill with variable speed and water feed capability
- Masking tape or a jig to steady the drill bit
- A marker, ruler, and level for accurate placement
- Safety gear: gloves, eye protection, and hearing protection
- Bulkheads, gaskets, and marine-grade silicone for sealing
- Backup materials for practice: scrap glass or acrylic
Step-by-step drilling guide
Follow these steps to drill safely. Practice on scrap material first.
- Plan placement
- Choose a spot above the waterline for returns and below for drains if needed.
- Avoid corners and curved panes where stress concentrates.
- Measure and mark
- Use a level and ruler to mark the center of the hole.
- Apply two layers of masking tape to reduce chipping.
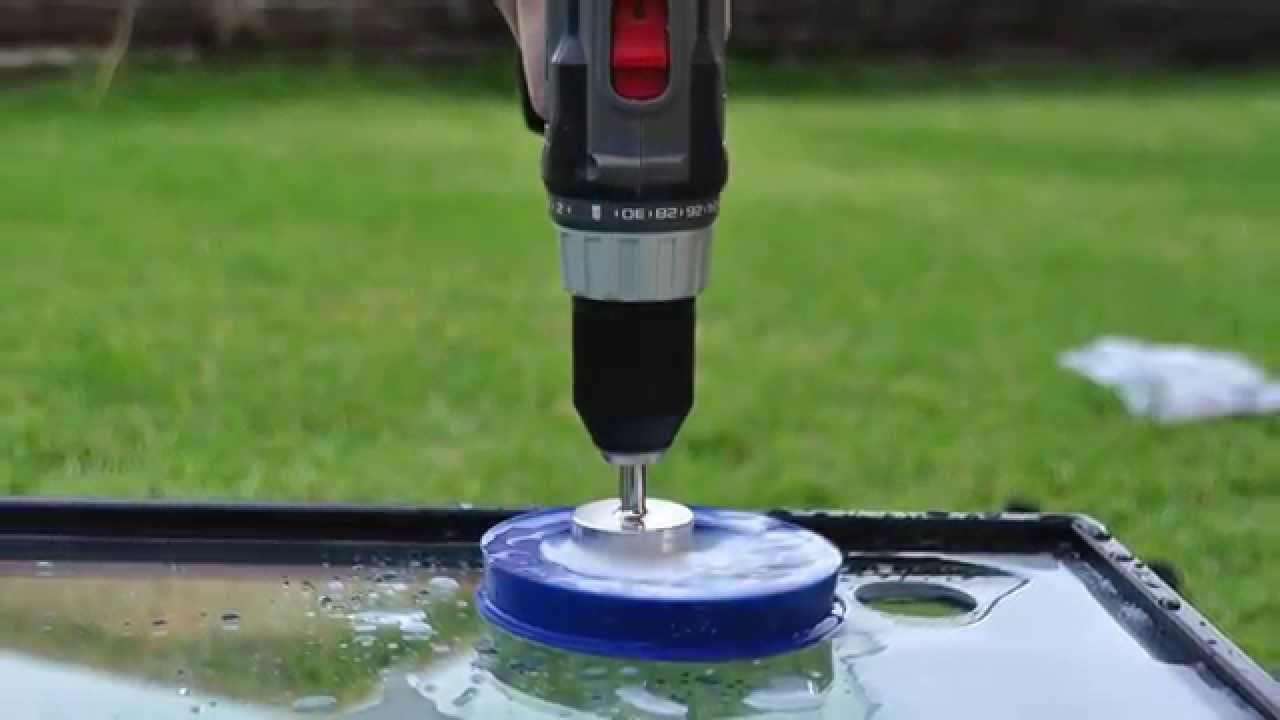
- Secure and cool
- Clamp or support the tank so it won’t move.
- Use continuous water flow to cool the bit and glass.
- Drill slowly
- Start at low speed and maintain gentle pressure.
- For glass, keep the bit flat until it bites; for acrylic, use a pilot hole if needed.
- Finish and inspect
- Rinse the hole and check for chips or cracks.
- Smooth edges with a diamond file if needed before installing hardware.

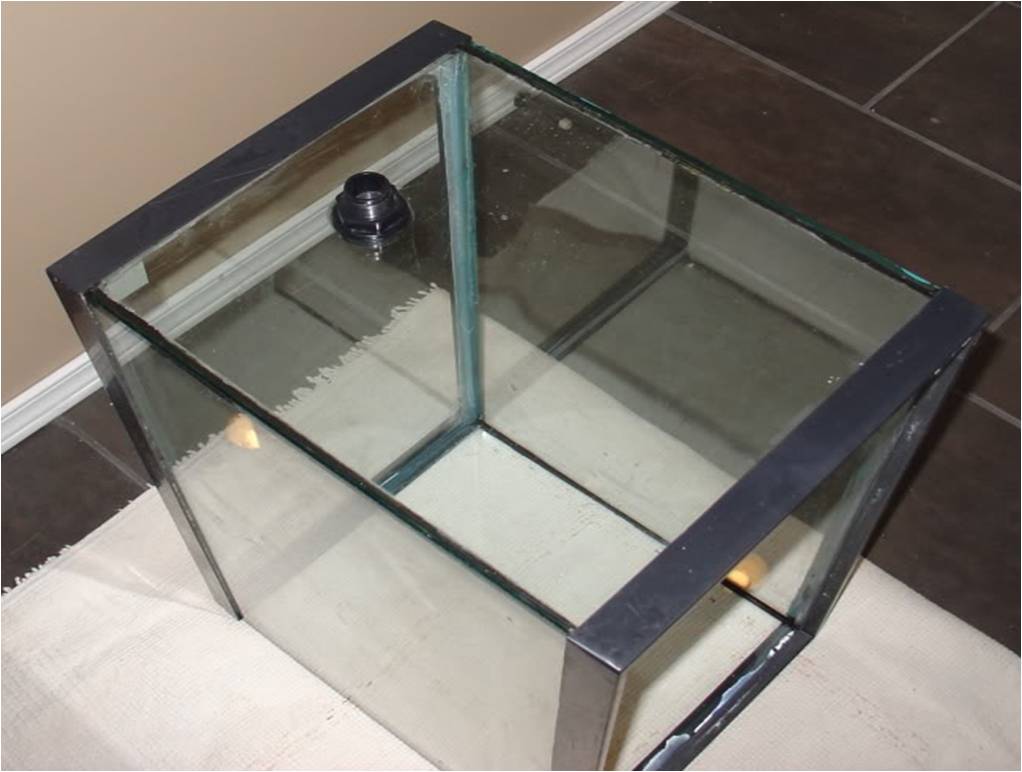
Sealing and installing bulkheads
A well-sealed bulkhead prevents leaks for years. Use marine-grade parts and follow these recommendations.
- Dry fit the bulkhead to verify alignment before applying silicone.
- Clean the hole with isopropyl alcohol and dry completely.
- Apply a thin bead of marine-grade silicone around the flange and tighten per manufacturer instructions.
- Let the silicone cure fully—often 24 to 48 hours—before filling the tank or testing pressure.
Test with a partial fill first to confirm there are no leaks. If the bulkhead leaks, drain and re-seal with fresh silicone and new gaskets.

Common mistakes and troubleshooting
Even careful people make mistakes drilling tanks. Know how to avoid them and fix problems.
- Mistake: drilling tempered glass
- Symptom: instant shatter or extensive cracking
- Fix: Do not attempt to use tempered panes; replace the glass.
- Mistake: overheating acrylic
- Symptom: melting, smoke, or rough edges
- Fix: slow the feed, add coolant, and polish edges.
- Mistake: poor placement
- Symptom: interference with decor or equipment
- Fix: reassess layout and drill a new hole in a better location if possible.
- Mistake: inadequate sealing
- Symptom: slow leaks or seepage
- Fix: disassemble, dry surfaces, and reapply proper silicone and gaskets.

Benefits and real-world use cases
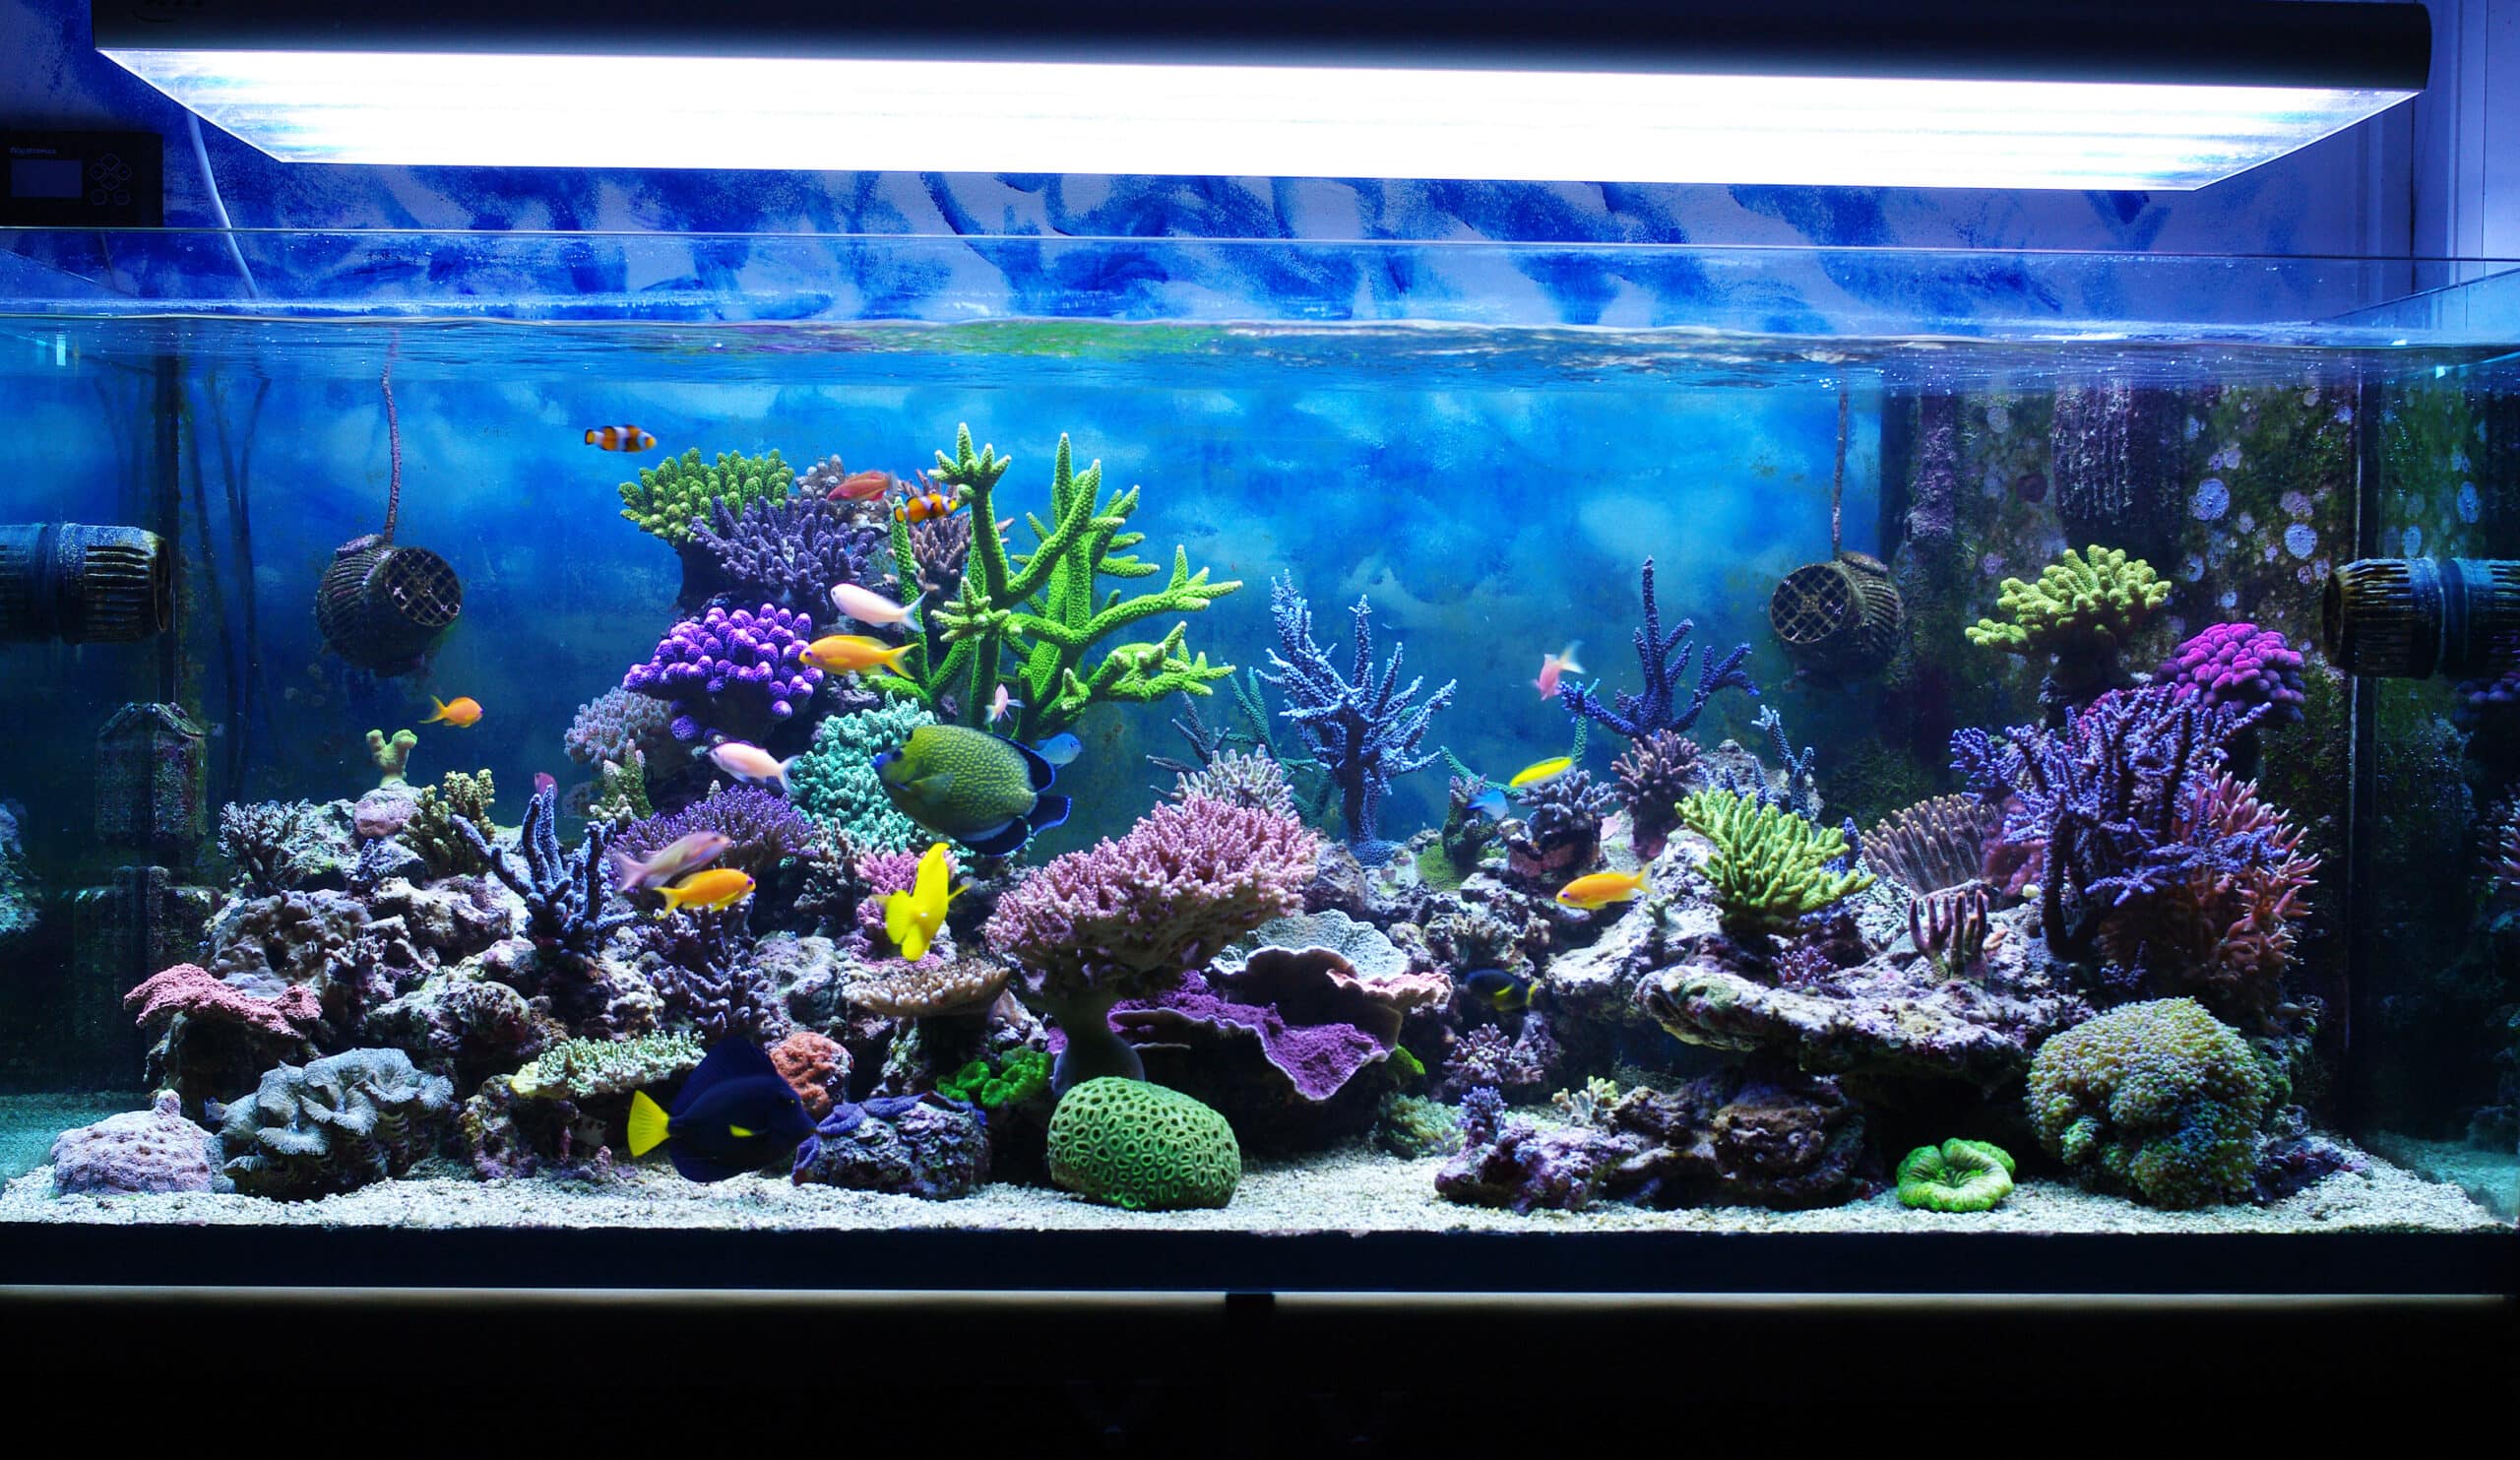
Understanding practical benefits shows why drill an aquarium is often the best option. A drilled tank provides tidy and permanent plumbing for advanced setups. Sumps stay hidden, water flow improves, and audible pump noise is often reduced. Professional installations and serious hobbyists prefer drilled tanks for long-term reliability and aesthetics.
- Use case: reef tanks with a sump system for water volume and filtration
- Use case: planted tanks with hidden canister return lines
- Use case: public displays where clean lines improve presentation and safety
Personal experience and tips from the field
I’ve drilled multiple tanks, learned from errors, and refined a checklist. My early mistake was rushing and not using water cooling; I cracked a pane and learned to slow down. Now I always pre-drill on scrap, tape the hole, and let the drill do the work. If you’re nervous, hire a local pro or ask an experienced hobbyist to supervise your first try.
- Tip: practice drilling on a scrap pane before working on your main tank.
- Tip: always check for tempered glass by tapping and looking for manufacturer stamps.
- Tip: label hole positions on a scaled diagram before marking the glass.
Frequently Asked Questions of why drill an aquarium
Why should I drill an aquarium instead of using external hoses?
Drilling an aquarium lets you install bulkheads for neat, permanent plumbing that hides hoses and reduces stress on fittings. It also improves flow control and reduces the chance of accidental disconnection.
Can I drill a tank myself if it is my first time?
Yes, you can if you practice on scrap, use the right tools, and follow steps carefully. If you feel unsure, ask a pro or experienced hobbyist to assist.
Is it safe to drill tempered glass?
No. Tempered glass will shatter when drilled because of internal stress. Only drill annealed or laminated glass and verify the glass type first.
What size hole should I drill for a bulkhead?
Match the hole to the bulkhead’s outer diameter or the manufacturer’s hole size recommendation. Measure twice, and use the correct diamond hole saw for a snug fit.
How long must silicone cure before I fill the tank?
Most marine silicones cure in 24 to 48 hours for a full seal, but follow manufacturer instructions for best results. Partial tests with limited water can reveal leaks before a full fill.
Conclusion
Drilling an aquarium is a valuable skill for advanced aquarium setups. It provides permanent plumbing, cleaner aesthetics, and better system performance when done correctly. Start with practice, use the right tools, and follow slow, careful steps to avoid damage. Take action: plan carefully, prepare well, and try a practice drill before you commit—then share your results or ask questions to keep improving.