The Best Substrate for Planted Aquariums: A Contrarian Guide Built on Real Mistakes
I wish someone had grabbed freshman-year me by the shoulders and warned me that choosing the best substrate for planted aquariums can quietly make or break a tank. Back then, I thought substrate was just… fancy dirt. I learned otherwise after Gerald the betta became the first and last victim of my uncycled gravel-only disaster. Since then, I’ve set up more nano tanks than my partner thinks is reasonable, and substrate mistakes have been some of the most annoying to fix.
Most guides sugarcoat substrate. They make it sound like you can toss any bag of aquarium dirt into a tank and your plants will magically root, thrive, and pearl. That hasn’t matched my experience. After years of testing everything from pricey aquasoils to thrift-store gravel, I’ve got strong opinions about what works, what definitely doesn’t, and what’s pure marketing fluff.
If you want the best substrate for planted aquariums, it helps to forget the hype and focus on what actually keeps roots fed, anchored, and oxygenated. Consider this a contrarian guide, built on my successes and my embarrassments, meant to save you from my mistakes.
Active vs. Inert Substrate: The Real Differences Nobody Explains Clearly
People overcomplicate this topic. Active substrate vs. inert substrate aquarium conversations often spiral into nitrogen chemistry charts and pH wars. You don’t need that.
The real difference, explained in normal human language:
Active substrate
– Comes loaded with nutrients
– Lowers pH and reduces carbonate hardness (KH), but doesn’t significantly soften general hardness (GH)
– Feeds heavy root feeders without extra steps
– Gradually loses buffering capacity and nutrient release over 1–3 years, depending on brand and conditions
Inert substrate
– Gravel, sand, baked clay, things like that
– Has no nutrients at all
– Doesn’t change water parameters
– Works fine if you add root tabs or a soil layer underneath
Now for the part nobody says out loud: most people can grow healthy plants in either one. You just need to know what job each type does.
If you want carpeting plants with lush roots and you keep softer-water species, active substrate makes life easy. But if you’re on a budget or you love a super clean minimalist look, inert substrate can be amazing with some added nutrients.
Why Your Plants Are Dying in Gravel (and the 3 Fixes That Actually Work)
I get DMs about this constantly. Someone buys bright white gravel, sticks a crypt in it, and wonders why it melts into sadness.
The reason is usually simple:
– Gravel has zero nutrients
– Roots slip between the stones instead of grabbing hold
– The color reflects light, which stresses many plants
– New hobbyists forget root tabs even exist
So why are my aquarium plants dying in gravel? Usually it’s not the gravel itself, but the lack of food and rooting support.
The only fixes that actually work:
1. Bury root tabs directly under each heavy root feeder. Not on top, not halfway around the tank, but exactly where the plant sits.
2. Mix in a little baked clay substrate. It helps with anchoring and subtly boosts nutrition.
3. Switch to a darker gravel or cap the bright stuff with something easier on the eyes. My design brain begged me to say this.

You can keep using gravel. Just treat it like a blank canvas, not soil.
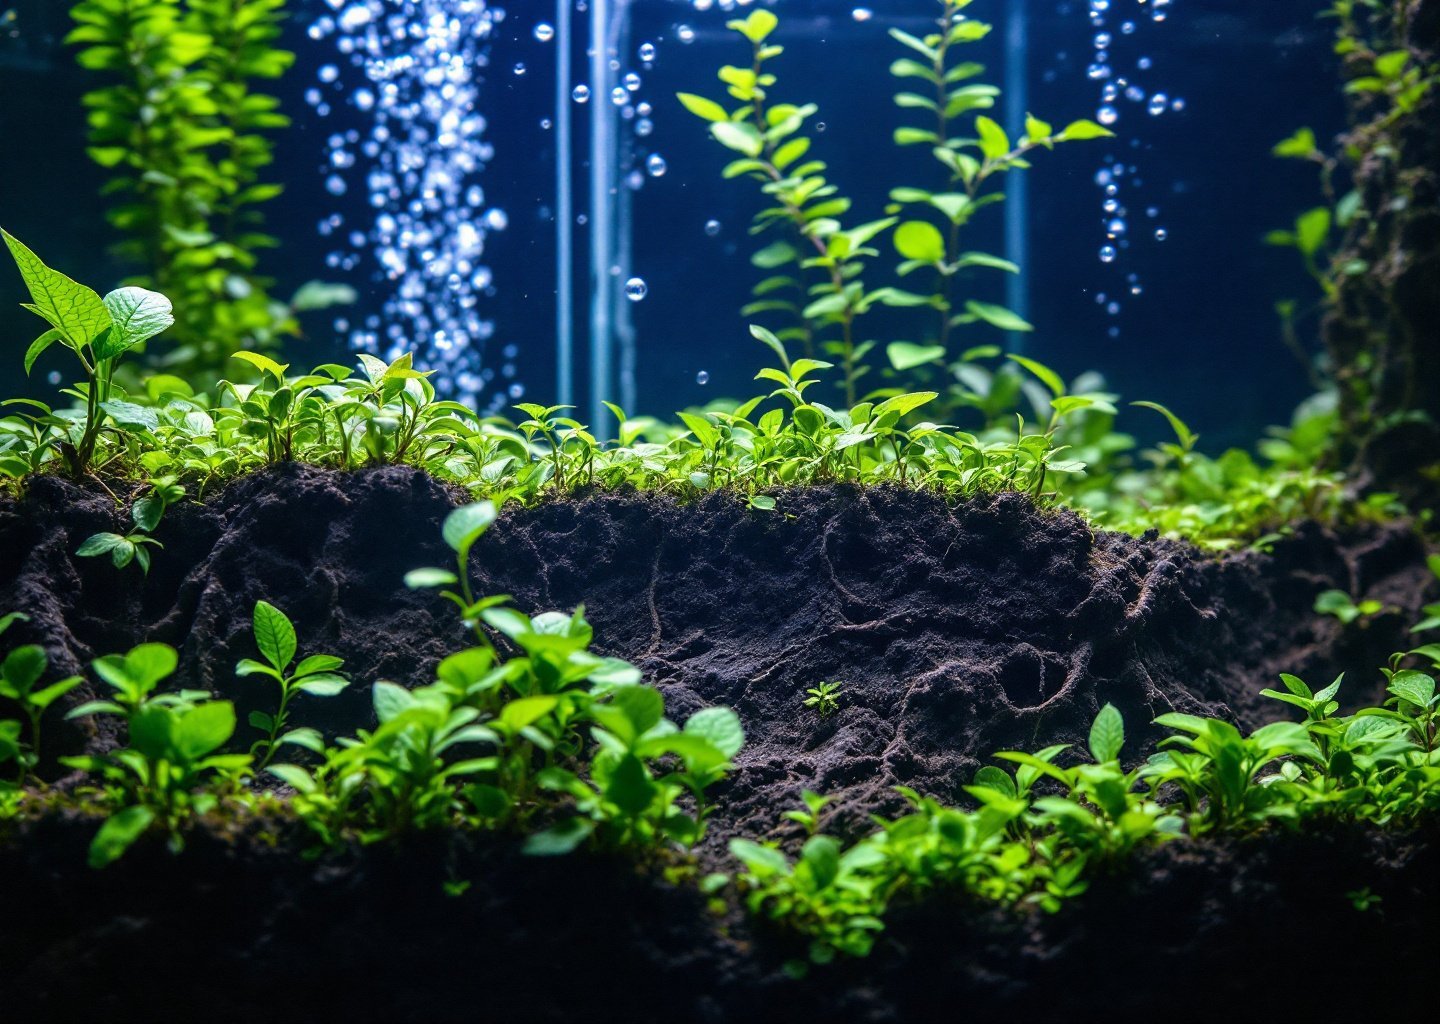
The Substrate Layering Method: Step-by-Step Depth Guide for Any Tank Size
Layering substrate saved my budget and my scapes. It lets you get aquasoil-level nutrition without aquasoil-level spending.
My go-to method for how to layer substrate in planted tank builds works like this:
Bottom layer: 0.5 to 1 inch
– Use organic potting soil without fertilizers
– Or use a small amount of active substrate where your heaviest root feeders will sit
Middle layer: 1 inch
– Add a barrier layer of sand or baked clay
– This keeps soil from erupting when you plant or rescape
Top layer: 1 to 1.5 inches
– Choose your final visible substrate, whether that’s gravel, sand, aquasoil, or whatever fits the scape
For optimal substrate depth for rooted aquarium plants, aim for 3 inches total in tanks larger than 10 gallons. In nano tanks, I usually get away with 1.5 to 2 inches because too much substrate overwhelms the proportions.
This layering approach gives plants the nutrient-rich substrate for aquatic plants they want without blowing your budget.
ADA Aqua Soil Alternatives 2024: Budget Picks I’ve Personally Tested
ADA Amazonia is amazing. I’m not denying that. It’s like gourmet plant food. But my wallet cried every time I filled a tank with it, and I eventually went hunting for cheaper options that still deliver that active substrate punch.
My top picks for best budget substrate for planted aquarium setups in 2024, after testing dozens of bags:
Fluval Stratum
– Lighter and cheaper than Amazonia
– Perfect for shrimp and nano tanks
– In my experience, tends to break down faster, though your mileage may vary
Landen Aqua Soil
– Nice granule size
– Holds its shape longer than Stratum
– Great for people who rescape often
UNS Controsoil
– My personal favorite budget substitute
– In my experience, produces minimal cloudiness when added
– Stable pH control
I’ve run all three in shrimp tanks without casualties. They support strong root growth and avoid the ammonia spikes Amazonia is infamous for. Your future self will thank you.

Matching Substrate to Plants: A No-Nonsense Decision Framework
People ask how to choose substrate for live aquarium plants, and usually they think they need to match every species with its own fancy soil. You really don’t.
Think about plants in three groups:
1. Heavy root feeders
Crypts, swords, lotus
– Best choice: active soil or layered substrate
– Works with inert substrate if you commit to root tabs
2. Column feeders
Stem plants, floating plants, mosses
– Substrate almost doesn’t matter
– Focus on water column nutrients instead
3. Carpeting plants
Monte Carlo, dwarf hairgrass, glossostigma
– Best option: active substrate or fine-grained inert substrate with soil underneath
– Gravel is possible but annoying, and you’ll probably hate it
Ask yourself two questions:
– What type of plants am I using?
– How often will I rescape?
Growing only stems and floaters in a scape you rearrange every month? Active soil can be overkill. Want a lush foreground carpet? Gravel makes life extremely hard.
This decision framework has saved me from buying the wrong bag of substrate at least twenty times.
Your First Four Weeks: The Complete Substrate Setup Checklist
You don’t need to guess. I’m sharing the exact checklist I use whenever I set up a tank, even now with seven nano aquariums humming in my apartment.
Week 1
– Pick substrate based on plant type, not marketing words
– Rinse lightly if inert; never rinse aquasoil
– Aim for at least 2 inches depth, more if you grow big root systems
– When using soil, add a barrier layer so you don’t regret planting day
Week 2
– Plant heavily to stabilize nutrients
– Start light fertilizing if using inert substrate
– Add root tabs exactly where plants sit
Week 3
– Check for melting, but don’t panic, especially with crypts
– Keep hardscape and substrate undisturbed
Week 4
– Adjust fertilizing based on growth
– Add more root tabs if you see yellowing or stunted roots
– Enjoy the payoff of your substrate choices
Follow this, and you’ll avoid the mistakes that haunted my early tanks. And maybe you’ll even have room in your budget for another tiny scape. I definitely always think I do.
Want to go deeper on specific substrates? Try reading my guide on beginner-friendly planted tank substrates or my breakdown of how to choose hardscape for nano aquascapes.